Most people cut a mango the same way every time: slice the two cheeks off the seed, score the flesh in a grid, push the skin inside-out, and eat the cubes standing over the kitchen sink. There is nothing wrong with this. It is efficient, it is honest, and it puts the Alphonso in your mouth in under a minute, which is often exactly what the situation demands. But there is an entirely different dimension to working with a mango — one that treats the fruit not just as something to eat but as something to present. Mango carving is the practice of transforming a single piece of fruit into a table centrepiece, a platter garnish, or a serving vessel through nothing more than a sharp knife, a steady hand, and an understanding of the fruit’s structure. Done well, it elevates any table setting from ordinary to extraordinary — and with the Alphonso’s deep golden-orange pulp and naturally thin, workable skin, it produces results that look far more difficult than they are.
This guide covers five techniques, arranged from beginner to advanced, with everything you need to know to choose the right mango, the right knife, and the right technique for the occasion.
Choosing the Right Mango for Carving
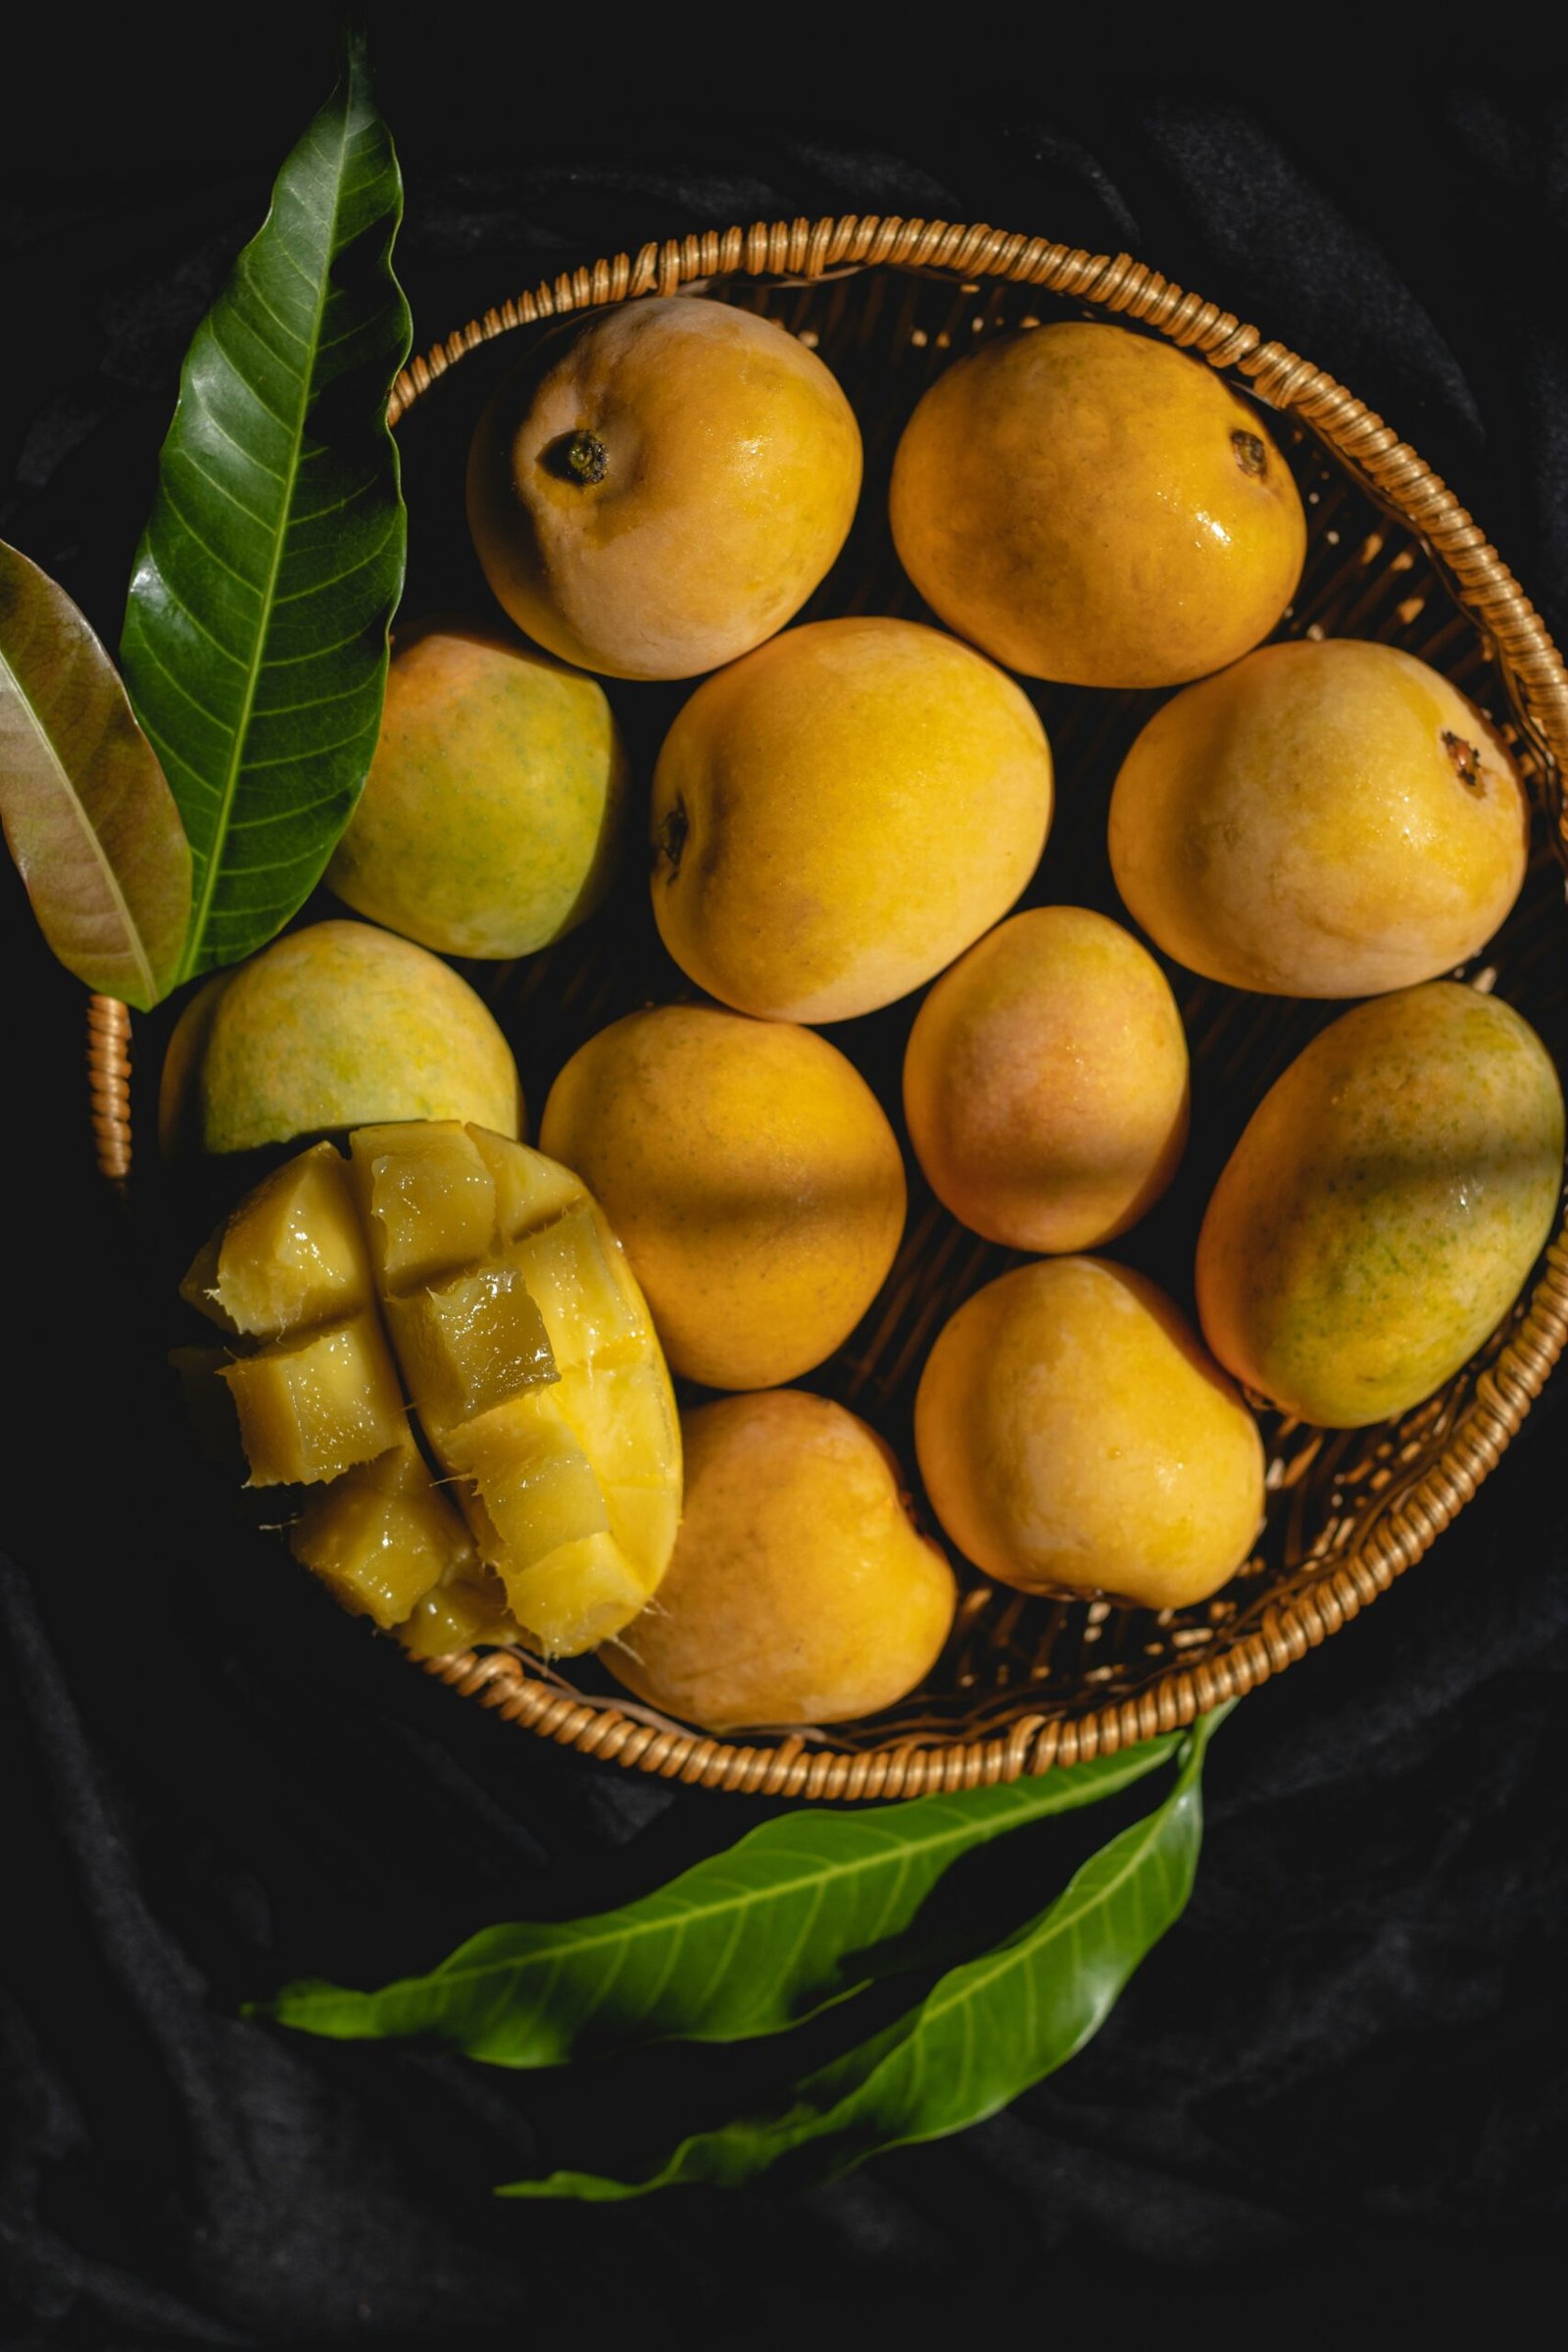
Not every Alphonso is equally suited to carving work. The ideal carving mango is firm-ripe — golden-yellow in skin color with the characteristic fragrance at the stem, but with enough structural firmness in the flesh that it holds clean cuts without collapsing or tearing. A mango that is fully soft at peak eating ripeness — the correct stage for pressing aamras — is too yielding for carving: the knife will drag through the flesh rather than cut cleanly, and scored patterns will close as the flesh relaxes.
For carving purposes, pull from your batch the mangoes that are fragrant and beginning to yield but still feel firm when pressed — typically one to two days before peak eating ripeness. Keep them at room temperature and plan to carve the same day you select them.
The Essential Knife
Mango carving requires two knives and nothing else: a sharp, thin-bladed chef’s knife for the primary cuts and cheek separation, and a sharp paring knife with a pointed tip for detail work, scoring, and decorative cuts. Sharpness is not optional — a dull knife tears flesh, loses the clean edge of scored patterns, and makes every technique harder than it needs to be. If your paring knife cannot slice cleanly through a sheet of paper, sharpen it before you begin.
Technique 1: The Hedgehog (Beginner)
The hedgehog is the most accessible mango presentation technique and the one most guests will recognize — but executed with precision on a perfect Alphonso, it remains genuinely impressive.
Method: Stand the mango stem-side up. Slice one cheek off each side of the flat seed — each cut made as close to the seed as possible to maximize yield. You will have two oval cheeks. Score each cheek in a crosshatch grid pattern — parallel cuts approximately 1.5 cm apart in one direction, then the same at 90 degrees to create squares — cutting through the flesh to within 2 mm of the skin without cutting through it. Push the skin firmly from beneath with your thumbs, inverting the cheek so the scored cubes fan outward into the classic spiked hedgehog formation.
The key to a clean hedgehog is consistent scoring depth: too shallow and the cubes do not fan properly; too deep and the skin tears. Practice once and the muscle memory forms immediately.
Technique 2: The Mango Fan (Beginner to Intermediate)
The fan is the most elegant of the simple presentations — clean, geometric, and visually striking on a plate without requiring any carving tools beyond the paring knife.
Method: Slice both cheeks from the mango seed as above. Peel each cheek using the paring knife, starting at one corner and pulling the skin away cleanly in one smooth motion. Lay each peeled cheek flat on the cutting board, skin-side down. Slice lengthwise into uniform strips — approximately 8 to 10 mm wide — cutting all the way through but leaving the strips connected at one narrow end (approximately 1 cm from the tip). Fan the strips gently apart in a spreading arc, using your index finger to guide each slice to a slightly different angle.
The fan works best when all slices are exactly the same width — use the first slice as your guide for every subsequent one.
Technique 3: The Mango Rose (Intermediate)
The mango rose is the single most visually spectacular thing a home cook can produce with a mango and a knife — a spiralling bloom of golden-amber mango slices arranged to resemble a full-petalled rose, used as a centrepiece on a fruit platter or as a garnish on a dessert plate.
Method: Peel the entire mango completely and slice very thin, uniform strips lengthwise from each side of the seed — each strip approximately 3 to 4 mm thick. Beginning with the smallest strips, roll the first one tightly into the centre spiral. Wrap successively larger strips around the outside, each one slightly overlapping the previous at the base and curving outward at the top edge to create the petal effect. Place the completed rose on a small circle of parchment to hold its base shape and refrigerate for 15 minutes before plating, which firms the pulp slightly and helps the rose hold its form on the plate.
The mango rose takes practice to get right — the first attempt rarely produces a tight, even bloom — but after two or three repetitions, the technique becomes intuitive.
Technique 4: The Mango Flower Garnish (Intermediate)
The mango flower is a carved garnish that transforms one mango cheek into a five-petalled flower used as a platter centrepiece or a plate decoration alongside aamrakhand, mango sago, or any plated dessert.
Method: Take one unpeeled mango cheek. Using the paring knife, cut a V-notch from the outer edge of the cheek inward — one notch for each petal, five notches equally spaced around the perimeter of the oval. Each notch should be cut at a slight inward angle so that when the petal piece is lifted slightly, it sits proud of the surface rather than flat. Between each V-notch, score a gentle curve in the flesh to represent the edge of each petal. Use the paring knife tip to lift each petal section very slightly — just enough to create dimension. The golden-orange of the Alphonso’s flesh against the green-gold of the skin creates a naturally striking two-tone flower that needs no paint or additional color.
Technique 5: The Mango Bird (Advanced)
The mango bird is the pinnacle of achievable home mango carving — a free-standing sculptural garnish that transforms a whole mango into a bird with defined wings, head, and tail, used as the centrepiece of a formal fruit platter.
Method: Slice a thin base from the mango’s underside so it sits flat and stable. From the top of the mango, make two long V-cuts on each side — the outer V creating the wing profile and the inner V defining the wing’s raised edge. Using the paring knife, undercut each wing section slightly to lift it away from the body of the fruit, creating a three-dimensional wing that stands slightly away from the mango’s surface. At one end, carve a small head shape and define a beak with two angled cuts. At the other end, make three to four graduated V-cuts to create a fanned tail. The entire bird sits on its base and is placed on a bed of fresh mint leaves or shaved ice for the most impressive platter centrepiece the mango season allows.
The Principle Behind All Five Techniques
Every technique in this guide operates on the same underlying principle: the Alphonso mango’s structure — its flat oval seed, its thin workable skin, its firm-when-unripe flesh that cuts cleanly, and its deep golden-amber color — makes it the ideal carving fruit. You are not fighting the fruit’s nature when you carve it. You are working with the same qualities that make it extraordinary to eat.
Start with the hedgehog. Make the fan the next time you have guests. Work toward the rose when you want to truly impress. And remember that at Kokan Samrat, every mango you receive was chosen for its fragrance, its density, and its skin integrity — the same qualities that make it not only the most delicious mango you can eat, but the most beautiful one you can carve.